Building Terraform Platform for Your Team Using AWS, Atlantis, and GitHub
Terraform is a versatile tool to manage your cloud infratructure. Terraform is open source and has been in the market for more than 5 years. It is the most popular tool out there to implement Infrastructure as Code (IaC). Managing cloud infrastructure using code makes way for automation. Code also enables better collaboration among team compared to point and click method such as a web UI.
This post helps you build Terraform platform for your team using an EC2 instance. Single EC2 instance is sufficient to host Atlantis since Atlantis is mostly used by internal team only. Atlantis needs to save execution plan to disk temporarily before applying it. Faster recovery in case the EC2 inaccessible is more important and cost effective compared to running it on multiple EC2 instances for high availability purpose. Running Atlantis in multiple EC2 instances means all instances need access to a shared directory. It makes setup for Atlantis more complicated and harder to maintain.
In this example, you are using Github as a place to store Terraform project. Atlantis is going to run each time a new PR is created. Atlantis can detect whether a PR contains a Terraform project and executes the Terraform project. It also runs when a new commit is pushed to an existing PR.
Integrating Atlantis with Github means you need to expose Atlantis to the internet. This is necessary so that Atlantis is able to receive webhooks from GitHub. Atlantis has a web interface but it doesn't have any authentication mechanism. Exposing a service to internet without authentication is a security issue. You are going to secure the Atlantis web interface using OAuth2 Proxy. Oauth2 Proxy is configured to use GitHub OpenID Connect provider.
Provision AWS resources for the Terraform Platform
One of the component of the Terraform platform is an EC2 instance where Atlantis is installed. You are going to use this Terraform module https://registry.terraform.io/modules/ringanta/ec2-atlantis/aws/ to launch the EC2 instance. This module requires an SSH public key. It handles launching EC2 with Elastic IP and security group for the instance. It picks a subnet from the default VPC.
Another components for the Terraform platform are S3 bucket and DynamoDB table. S3 bucket is used to store remote state for other Terraform projects. You can use a single bucket for multiple Terraform projects. Each project must have their own key to avoid key name overlapping. DynamoDB is a prime locking mechanism when using S3 as a Terraform backend. A single DynamoDB table is able to support multiple Terraform projects.
Let's create a directory for the Terraform platform using mkdir terraform-platform.
And then change working directory to the newly created directory using cd terraform-platform.
Before running the Terraform module, you need to generate an SSH key pair for the EC2.
Use the ssh-keygen -t rsa -b 2048 -f ~/.ssh/atlantis-server_rsa command.
SSH public key is stored on ~/.ssh/atlantis-server_rsa.pub.
You are going to need content of the SSH public key as a parameter in the main.tf file.
Let's create main.tf file with the following content.
// main.tf
module "atlantis" {
  source  = "ringanta/ec2-atlantis/aws"
  version = "1.0.0"

  public_key          = "<SSH_PUBLIC_KEY>"
  attach_admin_policy = true
}

resource "aws_s3_bucket" "terraform_state" {
  bucket = "terraform-s3-backend"

  versioning {
    enabled = true
  }
}

resource "aws_dynamodb_table" "terraform_lock" {
  name           = "terraform-lock"
  read_capacity  = 10
  write_capacity = 10
  hash_key       = "LockID"

  attribute {
    name = "LockID"
    type = "S"
  }
}
Replace SSH_PUBLIC_KEY with content of the SSH public key generated above.
S3 bucket name is shared by all AWS user so you may need to find a more unique bucket name for your need.
The attach_admin_policy = true parameter will attach the AdministratorAccess role to the EC2 using EC2 instance role.
AdministratorAccess is AWS builtin role that grant full access to an AWS account.
Let's create the providers.tf file and declare Terraform AWS provider and other Terraform configuration there.
// providers.tf
terraform {
  required_version = "= 0.12.26"
}

provider "aws" {
  version = "~> 2.66"
}

provider "random" {
  version = "~> 2.2"
}
Next, create the outputs.tf file with content below.
This file prints information necessary for installing Atlantis.
// outputs.tf
output "atlantis_ip" {
  value = module.atlantis.atlantis_public_ip
}

output "atlantis_ssh_user" {
  value = module.atlantis.atlantis_ssh_user
}

output "atlantis_xip_domain" {
  value = module.atlantis.atlantis_xip_domain
}
All is set and you are ready to provision AWS resources for the Terraform platform. Before running Terraform commands below, AWS credential with appropriate permission need to be configured in the local machine where the command is executed.
- Set AWS region where resources will be provisioned. For example, if you want to provision the resource in Tokyo region, you need to export the following variable,
export AWS_REGION=ap-northeast-1. Consult https://docs.aws.amazon.com/AWSEC2/latest/UserGuide/using-regions-availability-zones.html#concepts-available-regions for all available AWS region. - Run
terraform initto initialize the terraform project. - Run
terraform plan -out=tfplan.outto generate execution plan and review the execution plan. - Apply the change by executing
terraform apply tfplan.out.
Above Terraform commands create an EC2 instance, an S3 bucket, and a DynamoDB table for the Terraform platform. All those resources are created in the region defined on the AWS_REGION variable. After all resources has been provisioned, let's save all Terraform files into a Git repository using the following commands.
git init
echo -e ".terraform\ntfplan.out" >> .gitignore
git add .
git commit -m 'Initial commit'
git remote add origin <GITHUB_REPO_URL>
git push -u origin master
Most of the time you don't need to commit Terraform state file into a git repository. We'll make an exception for this Terraform project since this project won't change much. This project uses local state file. Git serves as a mechanism to share Terraform project along with the state file with other team member. It is recommended to publish this local git repository to a central repository where other team member can access it.
Prepare GitHub Credential for Atlantis
Atlantis recommends to create a dedicated GitHub user with name that easily identifiable to Atlantis. This is important because Atlantis will write comment as this user. Atlantis requires a GitHub Personal Access Token (PAT) with repo scope to run. It is also recommended for Github user used by Atlantis to have write access to the GitHub repository of the Terraform project. Follow https://www.runatlantis.io/docs/access-credentials.html#generating-an-access-token to generate GitHub PAT for Atlantis.
Atlantis web UI is secured by OAuth2 Proxy with GitHub as the OpenID Connect Identity Provider. OAuth2 Proxy needs OAuth client id and secret from a GitHub OAuth app. GitHub provides guide to create a new OAuth app on https://developer.github.com/apps/building-oauth-apps/creating-an-oauth-app/. GitHub OAuth creation requires the following information:
- Application name is a name for the OAuth app
- Homepage URL is homepage of the OAuth app. Format of the value is
https://<ATLANTIS_DOMAIN>. ATLANTIS_DOMAIN must be replaced with the output ofterraform output atlantis_xip_domain. - Authorization callback URL is OAuth2 Proxy callback URL. You can use this value
https://<ATLANTIS_DOMAIN>/oauth2/callback.
Record OAuth client id and client secret after successful creation of the OAuth app. These information are required later when configuring Atlantis.
Setup and configure Atlantis
Atlantis is installed on the EC2 created with Terraform project above. There is an Ansible role available on Ansible Galaxy that install and configure Atlantis on a Linux virtual machine. The role is available on https://galaxy.ansible.com/ringanta/atlantis. This role also install and configure other packages necessary to secure Atlantis installation.
Make sure Ansible 2.9 installed. You can install Ansible using pip as follow
pip install --upgrade ansible.Make sure working directory is in the
terraform-platformdirectory.Create Ansible inventory file and name the file
hosts. Add EC2 instance created above to the inventory file. The file content should look like the following.; filename: hosts [atlantis] <ATLANTIS_IP> ansible_user=ubuntuReplace ATLANTIS_IP with value from the
terraform output atlantis_ipcommand.Create vault password file to encrypt and decrypt Ansible variables value,
openssl rand -base64 18 > vault-pass-fileCreate Ansible playbook file (such as
playbook.yml) with the following content.# filename: playbook.yml --- - hosts: atlantis become: true roles: - role: ringanta.atlantis atlantis_domain: "<ATLANTIS_DOMAIN>" atlantis_url: "https://<ATLANTIS_DOMAIN>" atlantis_gh_user: "<GH_USER>" atlantis_gh_token: "<GH_TOKEN>" atlantis_gh_webhook_secret: "<GH_WEBHOOK_SECRET" atlantis_repo_allowlist: "<GH_REPO_LIST>" oauth2_proxy_cookie_secret: "<OAUTH2_COOKIE_SECRET>" oauth2_proxy_client_id: "<OAUTH2_CLIENT_ID>" oauth2_proxy_client_secret: "<OAUTH2_CLIENT_SECRET>" oauth2_proxy_gh_org: "<OAUTH2_GH_ORG>"Replace the following placeholders with an appropriate value:
- ATLANTIS_DOMAIN value can be acquired using the
terraform output atlantis_xip_domaincommand. - GH_USER and GH_TOKEN are GitHub username and PAT from the Prepare GitHub Credential for Atlantis section. Encrypt GH_TOKEN value using Ansible Vault so it is safe to commit,
ansible-vault encrypt_string --vault-password-file vault-pass-file '<GH_TOKEN>' - GH_WEBHOOK_SECRET is random value that also need to be set on the GitHub webhook configuration. Use the following command to generate and encrypt the value
ansible-vault encrypt_string --vault-password-file vault-pass-file $(openssl -rand -base64 18). - GH_REPO_LIST signifies which repositories are allowed to run Atlantis. For convenience, allow all repositories under certain GitHub organization. For example use
github.com/ringanta-demo-atlantis/*to allow all repositories underringanta-demo-atlantisGitHub organization. - OAUTH2_COOKIE_SECRET is a random value that can be generated and encrypted using the
ansible-vault encrypt_string --vault-password-file vault-pass-file $(openssl -rand -base64 18)command. - OAUTH2_CLIENT_ID and OAUTH2_CLIENT_SECRET are GitHub OAuth client id and secret from the Prepare GitHub Credential for Atlantis section. Encrypt the OAUTH2_CLIENT_SECRET using the
ansible-vault encrypt_string --vault-password-file vault-pass-file '<OAUTH2_CLIENT_SECRET>'command. - OAUTH2_GH_ORG is a GitHub organization whose member is allowed to access Atlantis web UI. For example, use
ringanta-demo-atlantisto allow member ofringanta-demo-atlantisGitHub organization to access Atlantis web UI.
- ATLANTIS_DOMAIN value can be acquired using the
Download atlantis role from Ansible Galaxy,
ansible-galaxy role install -p roles ringanta.atlantis.Run the
playbook.ymlplaybook to configure the Atlantis,ansible-playbook -i hosts --vault-password-file vault-pass-file --private-key ~/.ssh/atlantis-server_rsa playbook.yml -v.Set up GitHub webhook. Consult https://www.runatlantis.io/docs/configuring-webhooks.html#github-github-enterprise on how to create a webhook for Atlantis. Make sure to use the same value for secret of the webhook with the one in the
playbook.ymlfile.Visit Atlantis on the
https://<ATLANTIS_DOMAIN>using a browser. You'll be presented with the Sign in with GitHub button. Click the button, and you'll be redirected to GitHub authorization page. Authorize the app to access your account. You'll be redirected to the Atlantis landing page.
Atlantis has been installed and configured. Let's commit Ansible related files to the git repository.
echo vault-pass-file >> .gitignore
git add .
git commit -m 'Install and configure Atlantis'
git push
Trying out the Terraform Platform
You can try out the newly created Terraform platform by running a Terraform project.
The project must be hosted in a repository that is part of the Atlantis repository allowlist.
Let's create a simple Terraform project that utilize S3 bucket and DynamoDB table of the Terraform platform created before.
Create the providers.tf file with the following content.
terraform {
  required_version = "= 0.12.26"

  backend "s3" {
    bucket         = "mycompany-terraform-s3-backend"
    key            = "terraform-platform-test.tfstate"
    region         = "ap-northeast-1"
    encrypt        = true
    dynamodb_table = "terraform-lock"
  }
}

provider "aws" {
  version = "~> 2.66"

  region = "ap-northeast-1"
}
Add the Terraform project file into a git repository and publish it to a GitHub repository. Make sure GitHub repository is part of Atlantis allowlist.
Next let's create a dummy bucket using terraform.
You gonna submit a PR and execute the change via Atlantis.
Create a new branch locally.
After changing to the new branch, create the main.tf file with the following content.
resource "aws_s3_bucket" "bucket" {
    bucket = "dummy-bucket-for-testing-123abc"
}
Commit the change to the local git repo, push it to GitHub, and create a new PR.
Atlantis will pick the change and report the execution plan.
Below is an example of Atlantis report after running terraform plan.
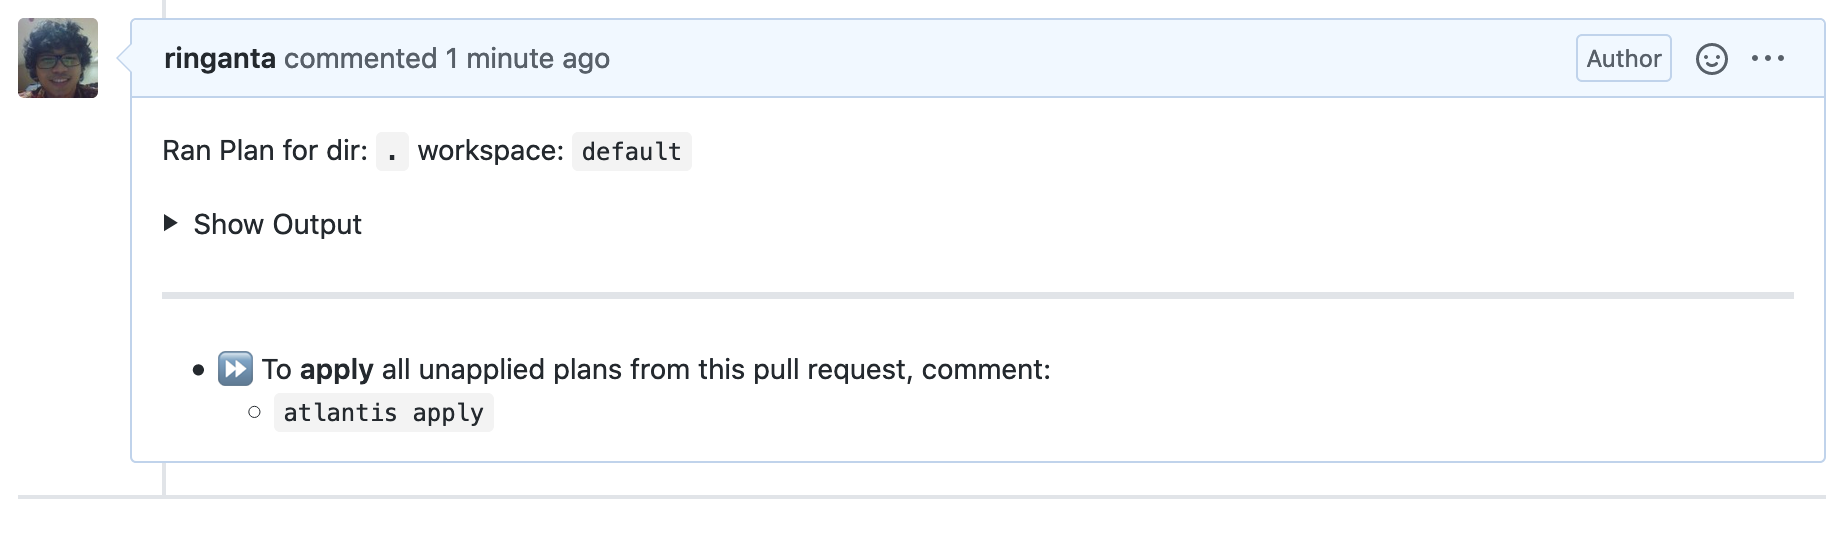
After verifying that Terraform execution plan is correct, apply the change by issuing atlantis apply comment on the GitHub PR page.
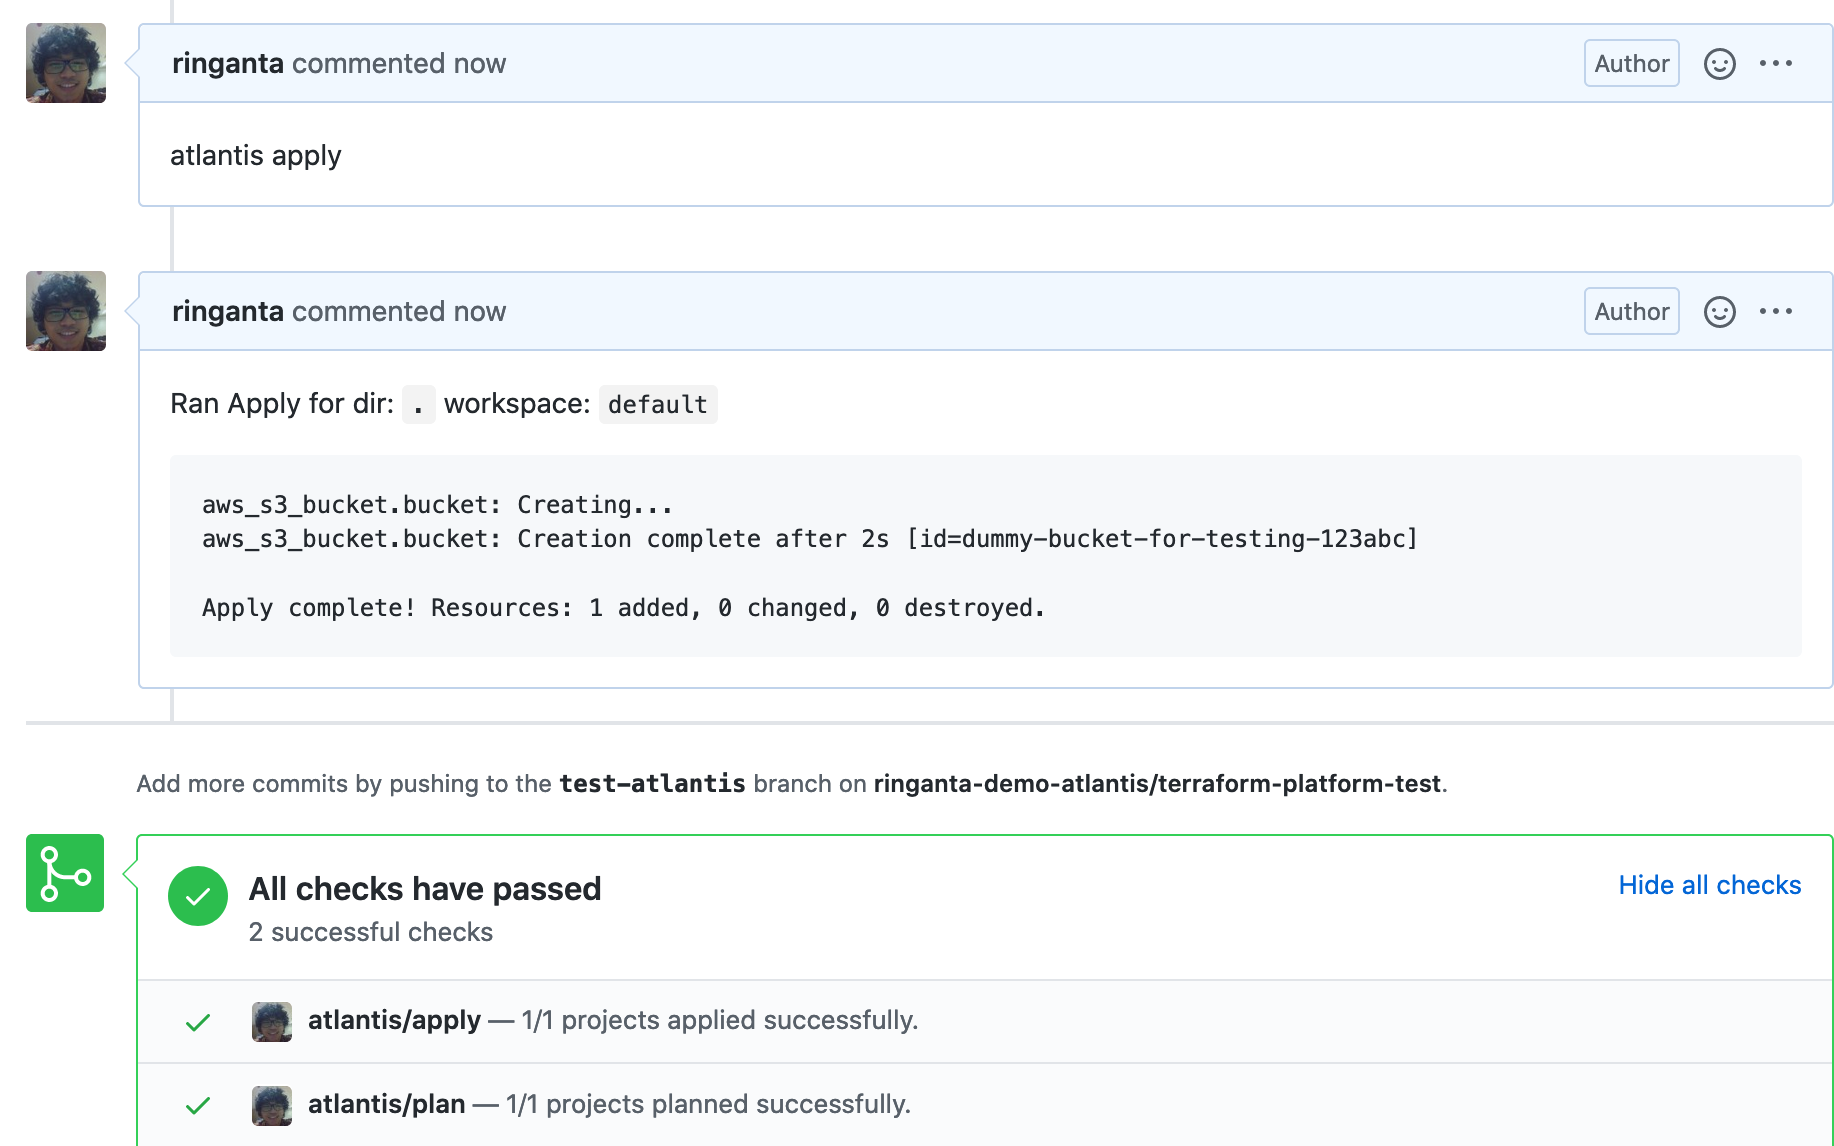
Atlantis will run the change and report back the result.
Below is example of Atlantis result after successfully applying execution plan.
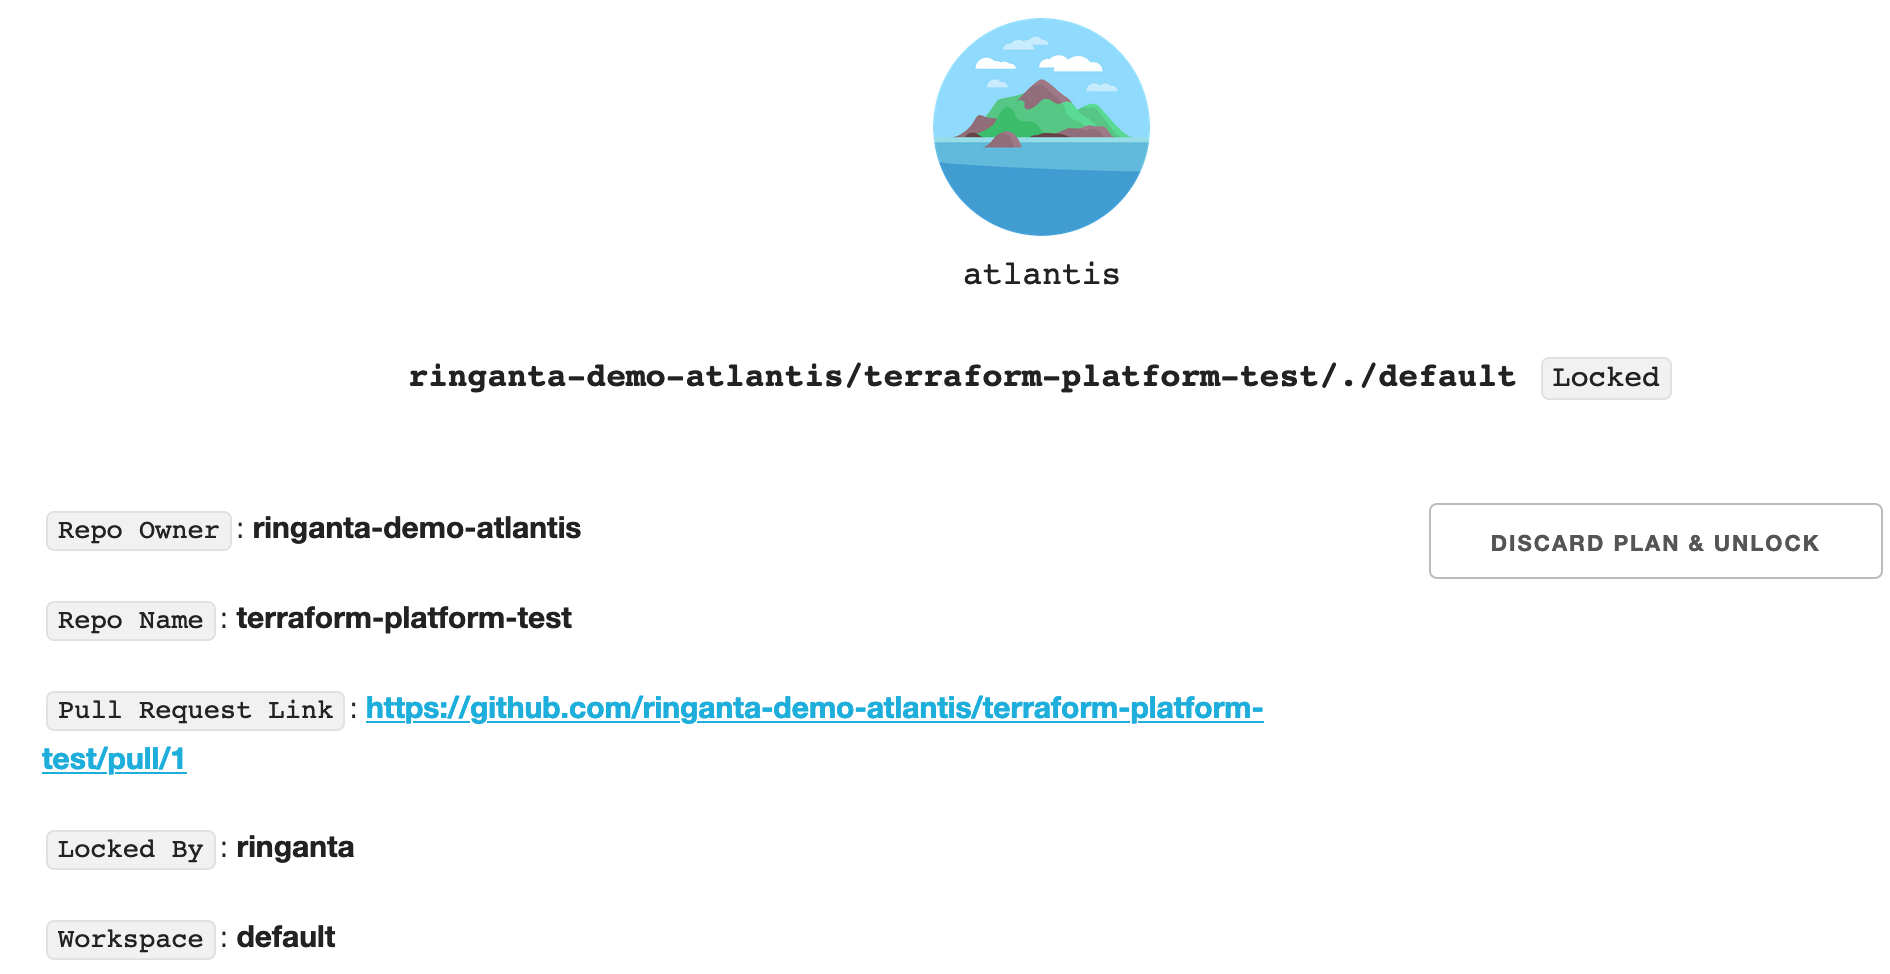
Atlantis web UI displays active lock of Terraform projects.
The lock will be deleted once a PR is merged.
We can also delete the lock from the web UI.
Here is an example of an active lock on an Atlantis web UI.
Conclusion
In this article, I show you how to setup Terraform Platform for your team using EC2, GitHub, and Atlantis.
The platform is using S3 as the remote state backend and DynamoDB table as locking mechanism.
Terraform and Ansible are used to provision and configure infrastructure for the platform.
All configuration are versioned in a Git repository and push to GitHub.
There is also a demonstration on how to run a new Terraform project using the Terraform platform.
Atlantis detects a new PR and reports execution plan to the PR page.
User needs to review the execution plan and issue atlantis apply to apply the execution plan.