Publishing My First Terraform Module
I was in the need to create an AWS ACM certificate where the alternate subject name consists of domains from multiple Route53 hosted zone. After Googling for a while, I can't find existing module that meet my need. So I decide to write one myself. Here is my journey of writing my first Terraform module that I publish to Terraform Registry. For the curious, I have experienced writing multiple Terraform module for private consumption before this attempt. I am not really beginner in writing Terraform module, but I strive to make this story followable by a beginner.
Terraform AWS ACM Multiple Hosted Zone Module
I decide to name the module terraform-aws-acm-multiple-hosted-zone.
The name is quite descriptive in which you can guess what it does from the name.
This naming follows requirements to publish public module to Terraform Registry.
You can find more information about the requirements on https://www.terraform.io/docs/registry/modules/publish.html#requirements.
I am targetting the module for Terraform 0.12 to make thing simple for me. I use those version in my day to day job. So I don't see immediate need to support Terraform version 0.11 or below. Feel free to add support for Terraform version lower than 0.12.
Creating Github repository for the module
Source code of terraform-aws-acm-multiple-hosted-zone module is hosted on Github.
Let's create the repo for this module.
- Go to https://github.com/new to create a new repository.
- Fill in the Repository name field with
terraform-aws-acm-multiple-hosted-zone, the Description field withTerraform module to create ACM certificate with multiple Route53 hosted zone, choose Public to make repository public, and click Create repository button to complete repository creation process.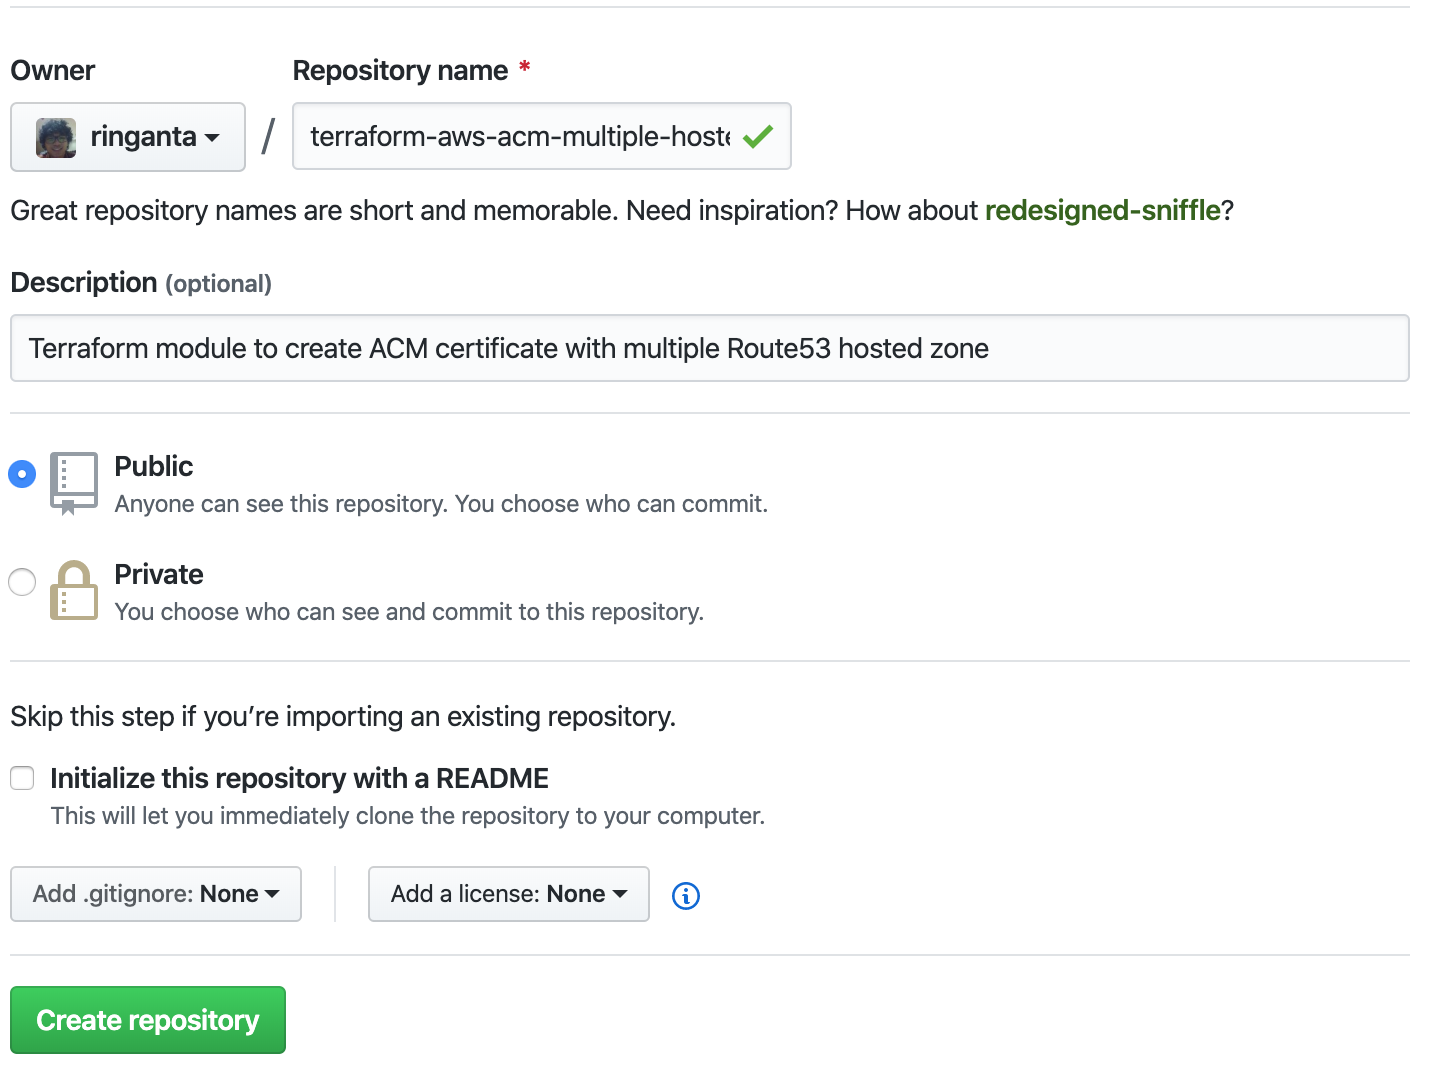
Now this repository is ready to host source code of the module.
Writing module source code
Before writting logic for this module, let's create the skeleton first. I follow standard module structure described on https://www.terraform.io/docs/modules/index.html#standard-module-structure.
- Create directory for the module. Give it a same name with the module name,
mkdir terraform-aws-acm-multiple-hosted-zone. - Change working directory to the newly created directory,
cd terraform-aws-acm-multiple-hosted-zone. - Create skeleton files and directories
touch README.md main.tf outputs.tf variables.tf mkdir -p examples/basic touch examples/basic/{README.md,main.tf,outputs.tf,providers.tf} - Initialize git repository on this directory
git init git add . curl https://gitignore.io/api/terraform > .gitignore # Ignore unnecesary Terraform files from git git commit -m 'Initialize git repository' - Publish initialized repository to Github
git add origin git@github.com:ringanta/terraform-aws-acm-multiple-hosted-zone
git push -u origin master
Here is initial structure for the module
.
├── README.md
├── examples
│   └── basic
│       ├── README.md
│       ├── main.tf
│       ├── outputs.tf
│       └── providers.tf
├── main.tf
├── outputs.tf
└── variables.tf
Example of usage is under the examples/basic directory.
This is useful to help test the module while writing it.
I use terraform-aws-acm module as reference.
This module request ACM certificate for multiple domains within a single hosted zone.
This module receive domains for certificate from domain_name and subject_alternative_names variables.
They accept string and list of string respectively.
These variables map nicely with variable required by the aws_acm_certificate resource.
The resource accepts a single hosted zone ID that correspond to a single Route53 hosted zone that will be used to validate certificate using domain validation method.
I have a requirement to support certificate with list of domains in multiple hosted zones.
So It is necessary to know domain name and its hosted zone mapping.
That's why I modify domain_name variable to accepts a map that contains domain name and its hosted zone.
Hosted zone is in the zone key, while domain name in the domain key.
Here is an example value for the domain_name variable.
domain_name = {
    zone = "example.com"
    domain = "example.com"
}
The subject_alternative_names variable consist of list of map that contains domain name and its hosted zone.
Here is an example value for the subject_alternative_names variable.
subject_alternative_names = [
    {
        zone = "example.com"
        domain = "*.example.com"
    },
    {
        zone = "example.org"
        domain = "example.org"
    }
]
This is the biggest difference between this module and terraform-aws-acm.
I also doesn't implement some options from terraform-aws-acm that I don't see the immediate need to simplify this new module.
My approach in building this module is to create a bare minimum code so the module is callable.
After that, I prepare the necessary code under the example/basic directory to call this module.
Once this works, I start to add more logic to this module.
When I want to test a new logic that I write, I verify the result by running the example usage under example/basic.
I keep going back and forth between adding more logic to the module and call it from the example/basic until I satisfied with the result.
Once in a while after verifying the new logic, I commit the change.
After the module logic is stable, I push the changes to the designated repository on Github.
A little of backstory, I was encountering an issue where the certificate will be created everytime I ran the module.
It induces so much frustation that I almost abandon this project.
After tinkering with the issue for a while, I found that ACM certificate was created because the order of subject alternative name in the certificate was different with the order when I requested it.
Arm with this knowledge, I decided to sort list of subject alternative name lexicographically using builtin function sort and reverse the order using the reverse function.
Based on my previous test, the certificate ordering messed up when wildcard name (domain that contains *.) precedes non wildcard one.
I implemented this, done a couple round of test, and I were pretty sure thing is stable.
Before publishing the code to Github repository, I decided to do one round of test. To my surprise, the previous issue surfaced. It brought up the prior frustation because my mental model was broken. Luckily after googling a bit, I found outstanding issue that Terraform doesn't maintain order of subject alternative names. You can see the issue on https://github.com/terraform-providers/terraform-provider-aws/issues/8531. Arming with this knowledge, I implented the workaround described in the issue. I made peace with myself and decided to go on and publish this module.
Back to adding the finishing touch to the module, I decide to license terraform-aws-acm-multiple-hosted-zone module with Apache 2. It's the same license with the terraform-aws-acm module. I even download the license file from the terraform-aws-acm module repository.
curl -sLo LICENSE https://raw.githubusercontent.com/terraform-aws-modules/terraform-aws-acm/master/LICENSE
git add .
git commit -m 'Add Apache 2 license'
The final touch is enriching this module with README.md.
It contains a short description about this module and explanation about its usage.
I believe that usage example is an important part to help other adopt it.
Another important information that should be put in the README.md is variables and outputs of the module.
I use terraform-docs to generate inputs and outputs of the module and copy paste the result to README.md. It's ready to see the world. The complete code is available on https://github.com/ringanta/terraform-aws-acm-multiple-hosted-zone.
I have met 4 out of 5 requirements to publish Terraform module as described on https://www.terraform.io/docs/registry/modules/publish.html#requirements. Let's met the final requirement by creating a git tag with semantic versioning. I decide to use v1.0.0 for the initial release.
git tag v1.0.0
git push --tags
Publishing the module to Terraform Registry for Public Consumption
We don't need to create a new account on Terraform Registry to publish public module since we can use Github account. Let's sign in to Terraform Registry using exiting Github account.
- Go to https://registry.terraform.io/sign-in and click Sign in with GitHub.
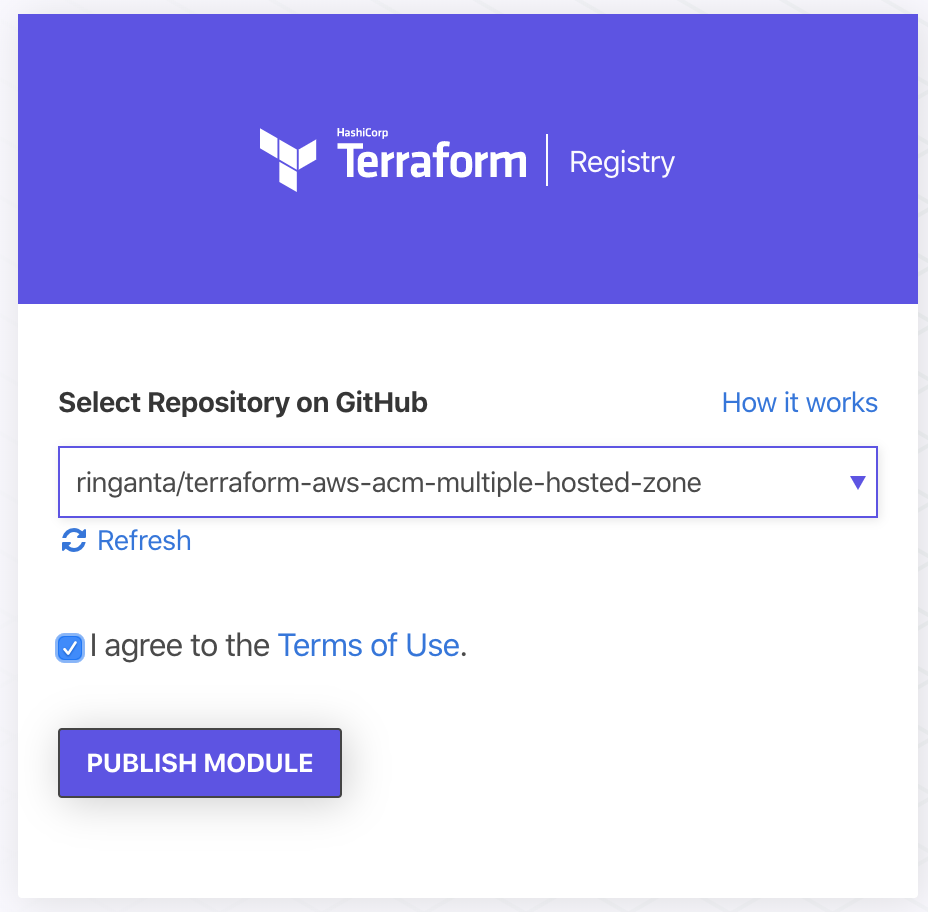
- At the top right corner, click the Publish button.
- Choose repository to publish and click PUBLISH MODULE button to complete the process.
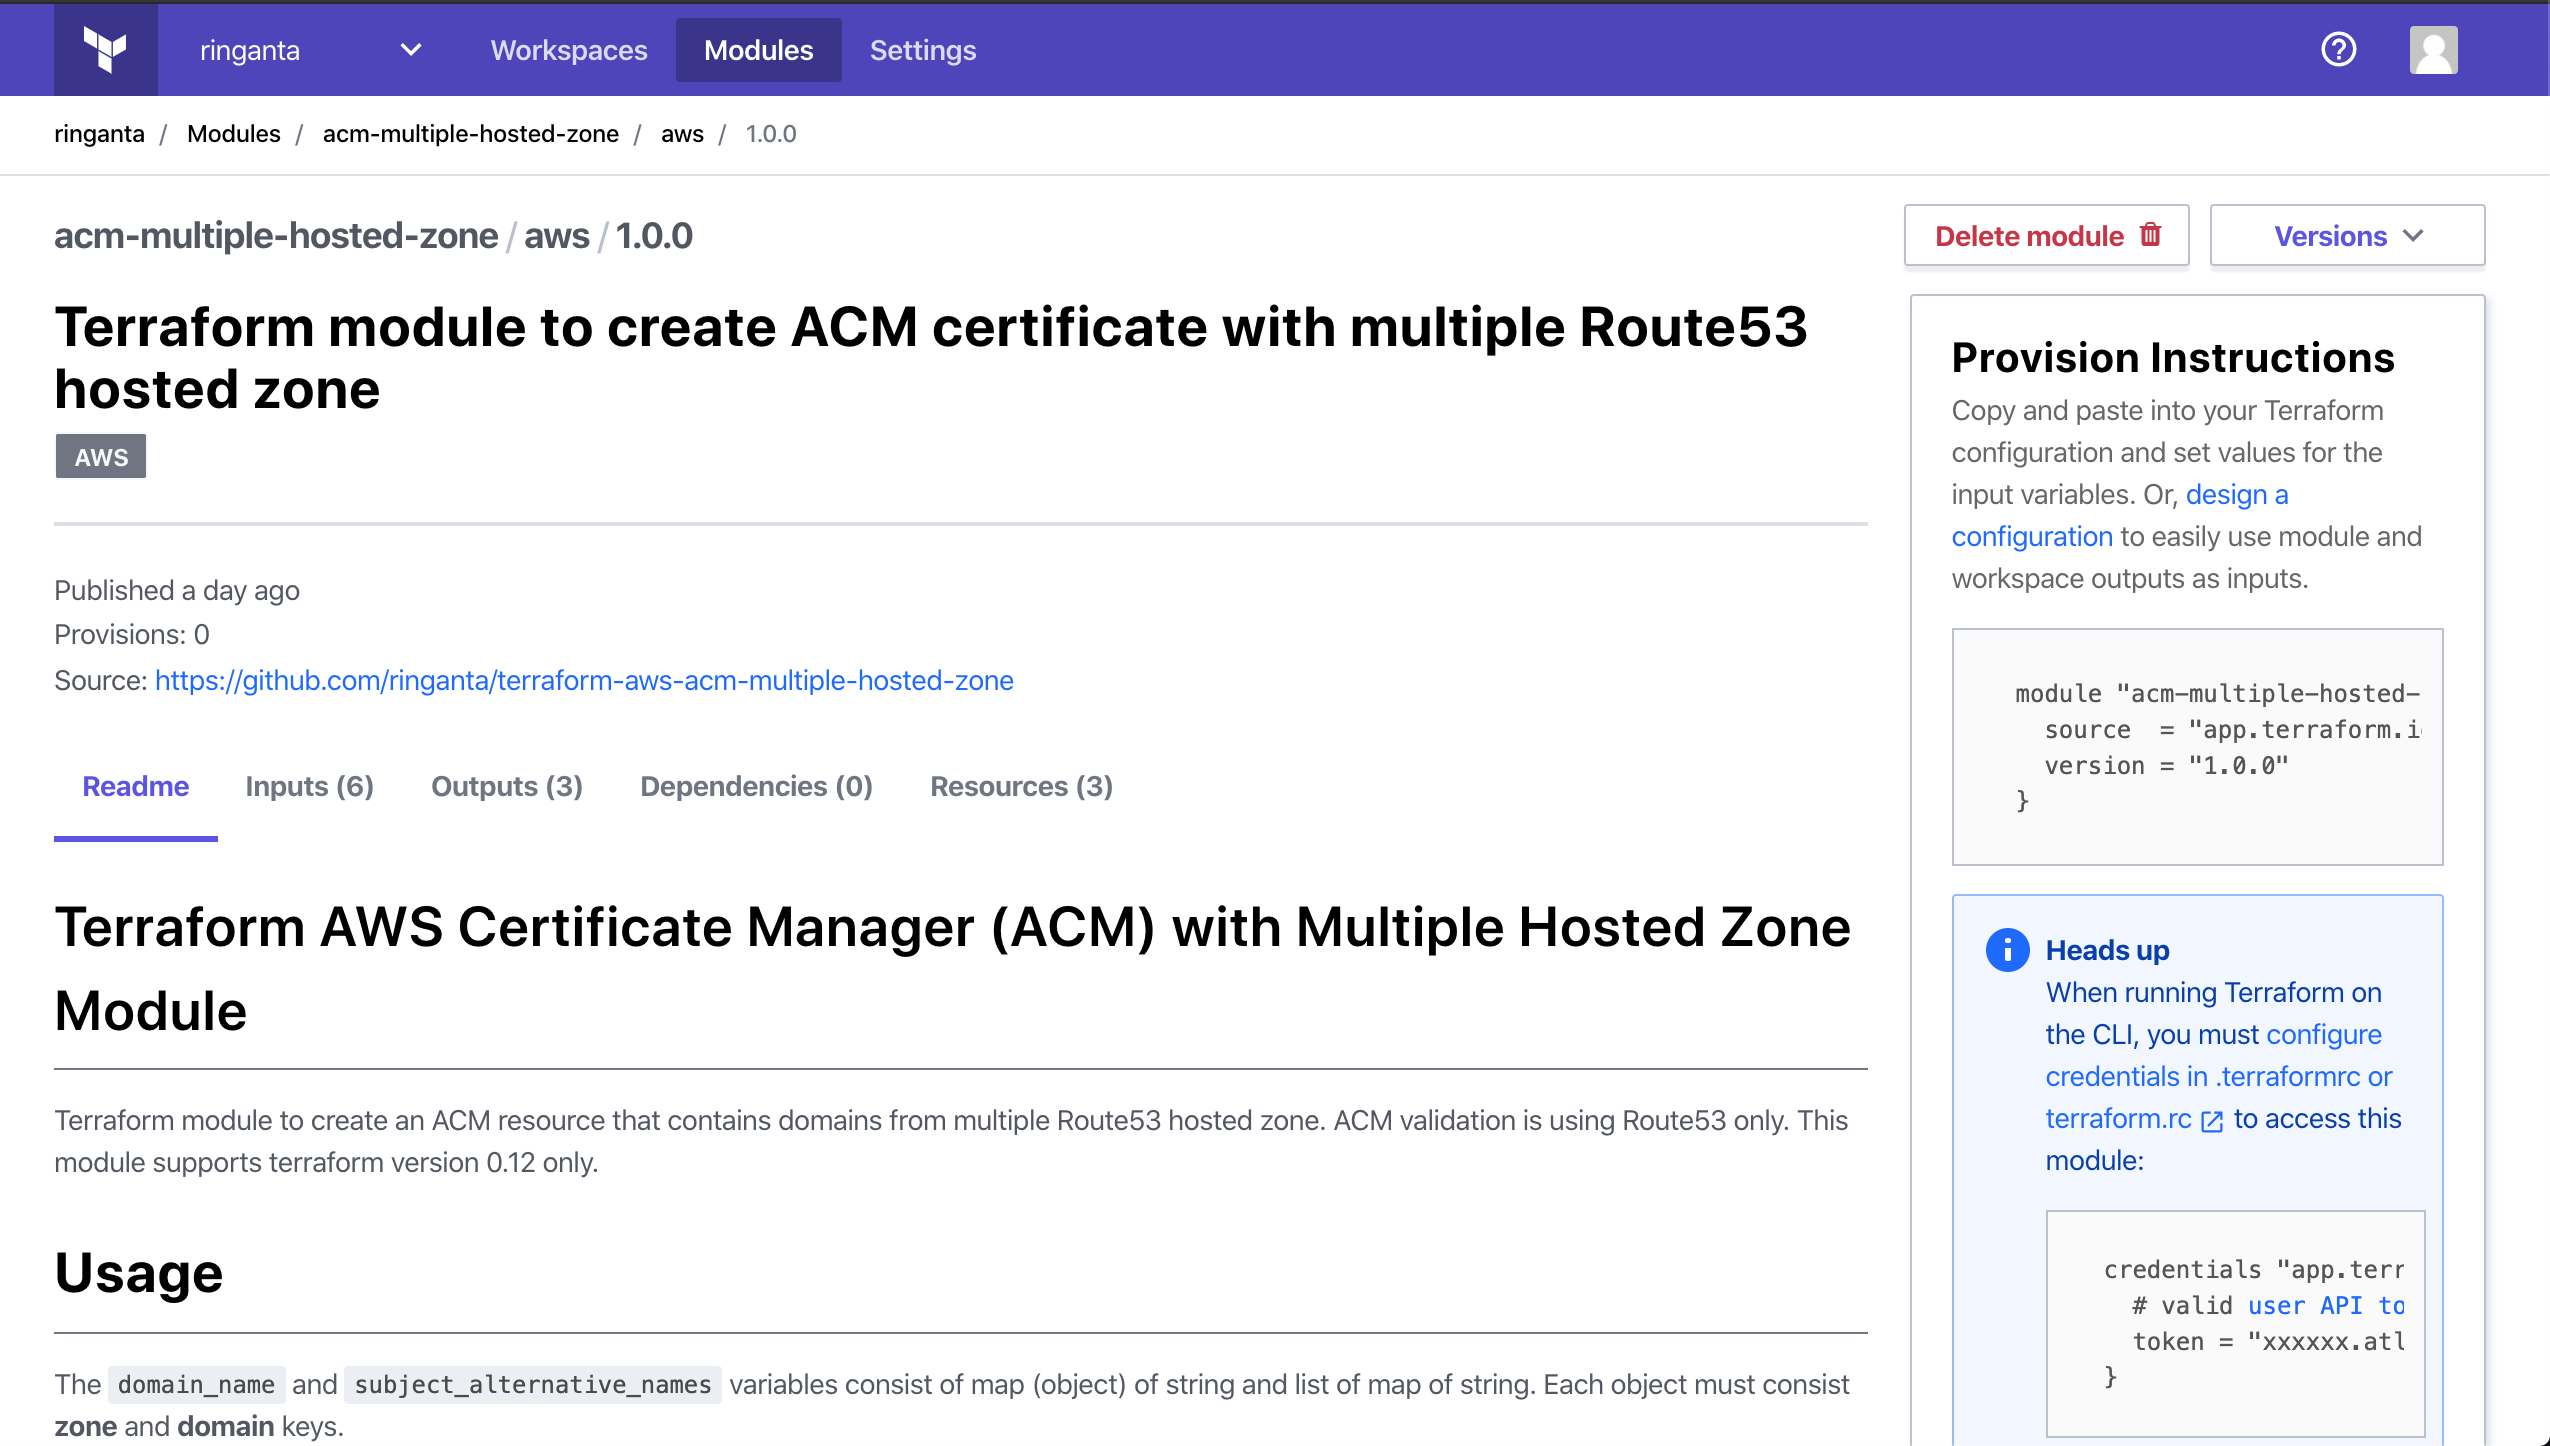
Module is successfully published. It's searchable on Terraform Registry. It is also accesible on https://registry.terraform.io/modules/ringanta/acm-multiple-hosted-zone/aws/1.0.0
Publishing the module to Terraform Cloud for Private Consumption
Just out of curiosity, I decide to publish the module also to Terraform Cloud. Terraform Cloud provides private registry to host module that can be consumed by team member only. I want to learn the different experience of publishing Teraform module to private and public registry.
I already have Terraform Cloud account before writing this module so I'll use it instead of creating a new one.
You can create a new account on https://app.terraform.io/signup/account.
I use existing organization named ringanta under my personal Terraform Cloud account to publish this module.
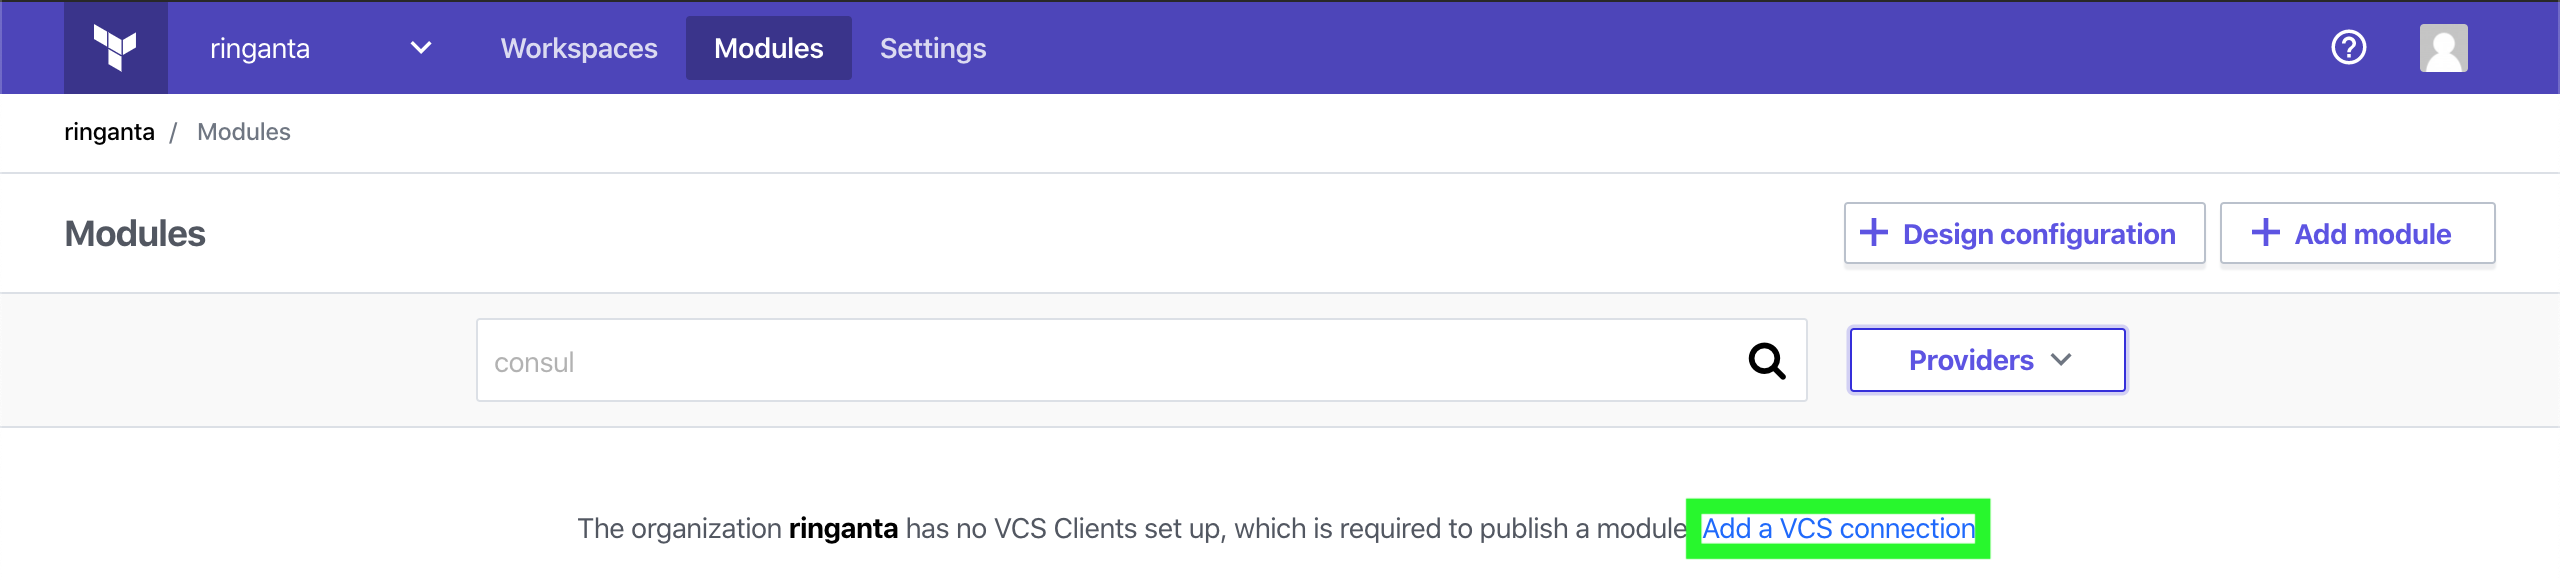
First I need to established VCS connection between my Github and Terraform Cloud.
- Login to Terraform Cloud and go to the Modules dashboard.
- Click the Add a VCS connection link.
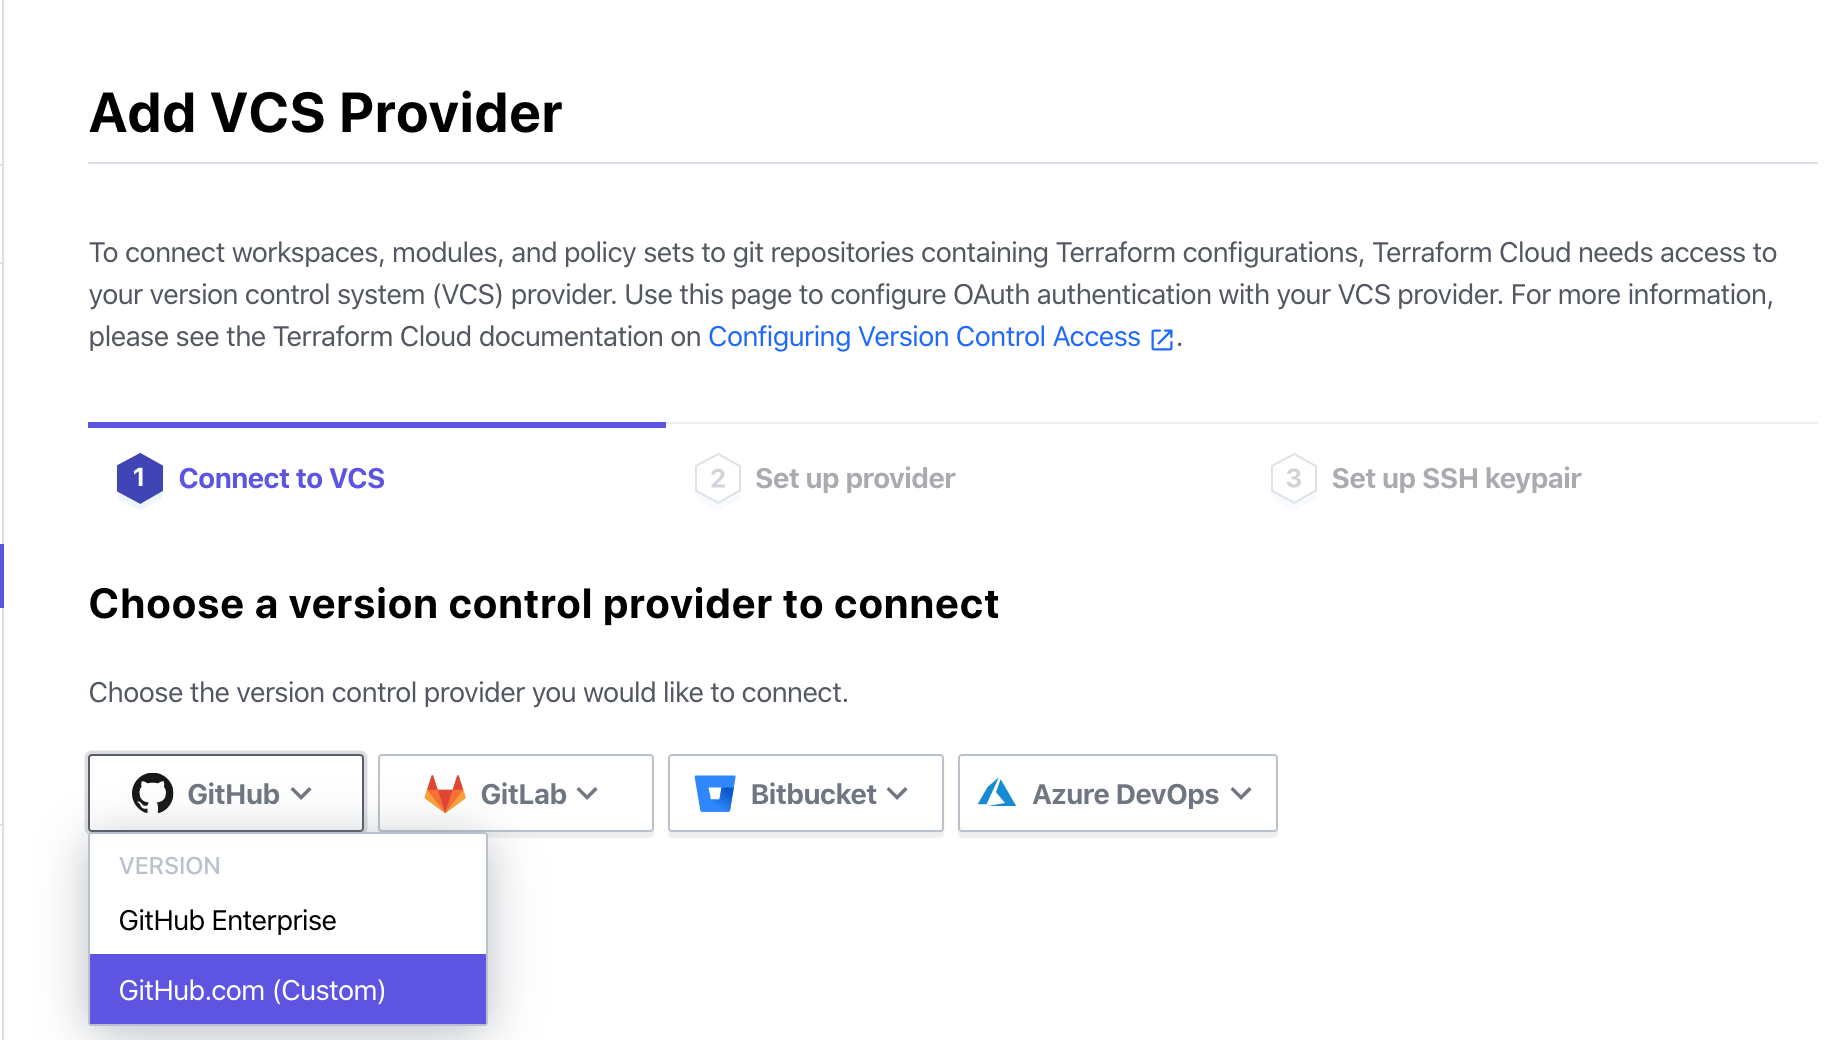
- At the Connect to VCS tab, choose Github > Github.com (Custom).
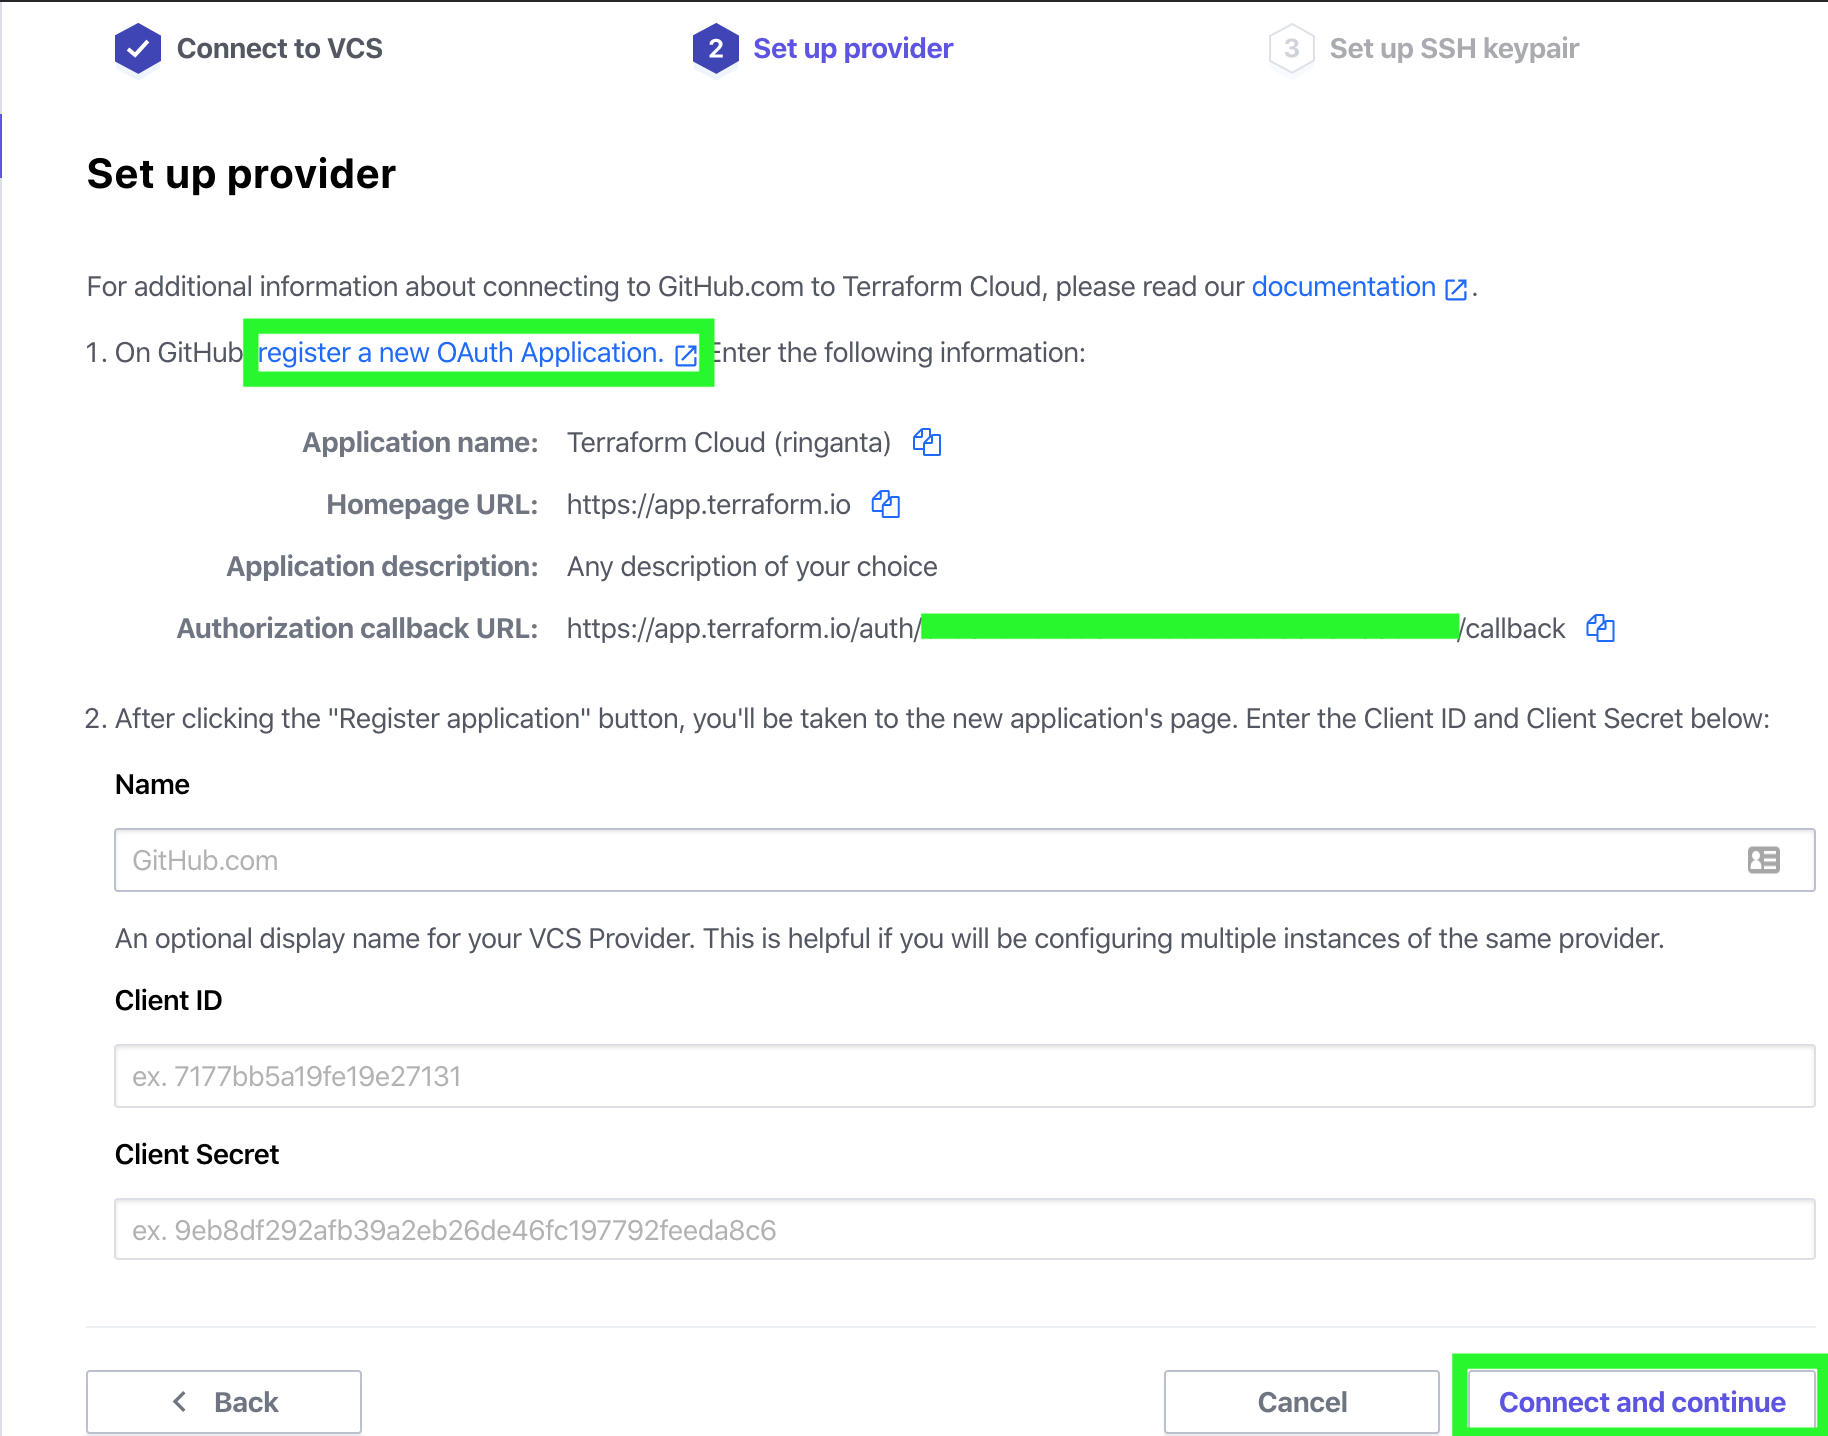
- At the Set up Provider tab, click the register new OAuth Application link. We will be redirected to OAuth application creation page on Github.
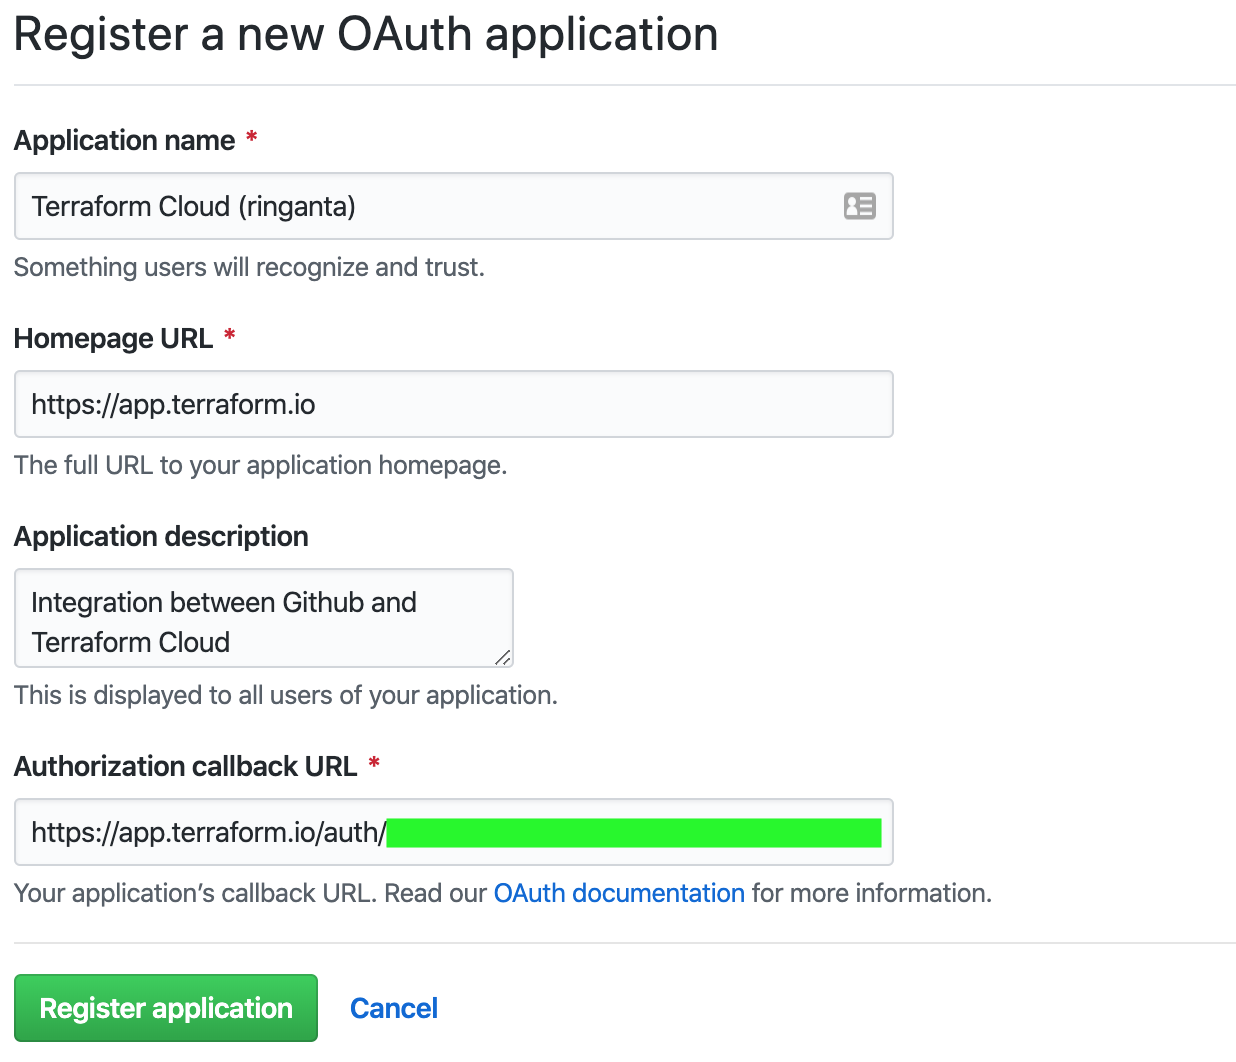
- Fill in the Application name field with the value of Application name from the Set up Provider tab on Terraform Cloud page.
- Fill in the Homepage URL field with the value of Homepage URL from Terraform Cloud page.
- Fill in the Application description field with information that describe integration between Github and Terraform Cloud.
- Fill in the Authorization callback URL field with value of the same field name from Terraform Cloud page.
- Click the Register application button to complete OAuth application creation. We'll be shown OAuth Client ID and Client Secret that will be needed on Terraform Cloud page.
- Back to the Set up Provider tab on Terraform Cloud, fill in Client ID and Client Secret fields with information from Github. Click Connect and continue to establish OAuth integration between Terraform Cloud and Github.
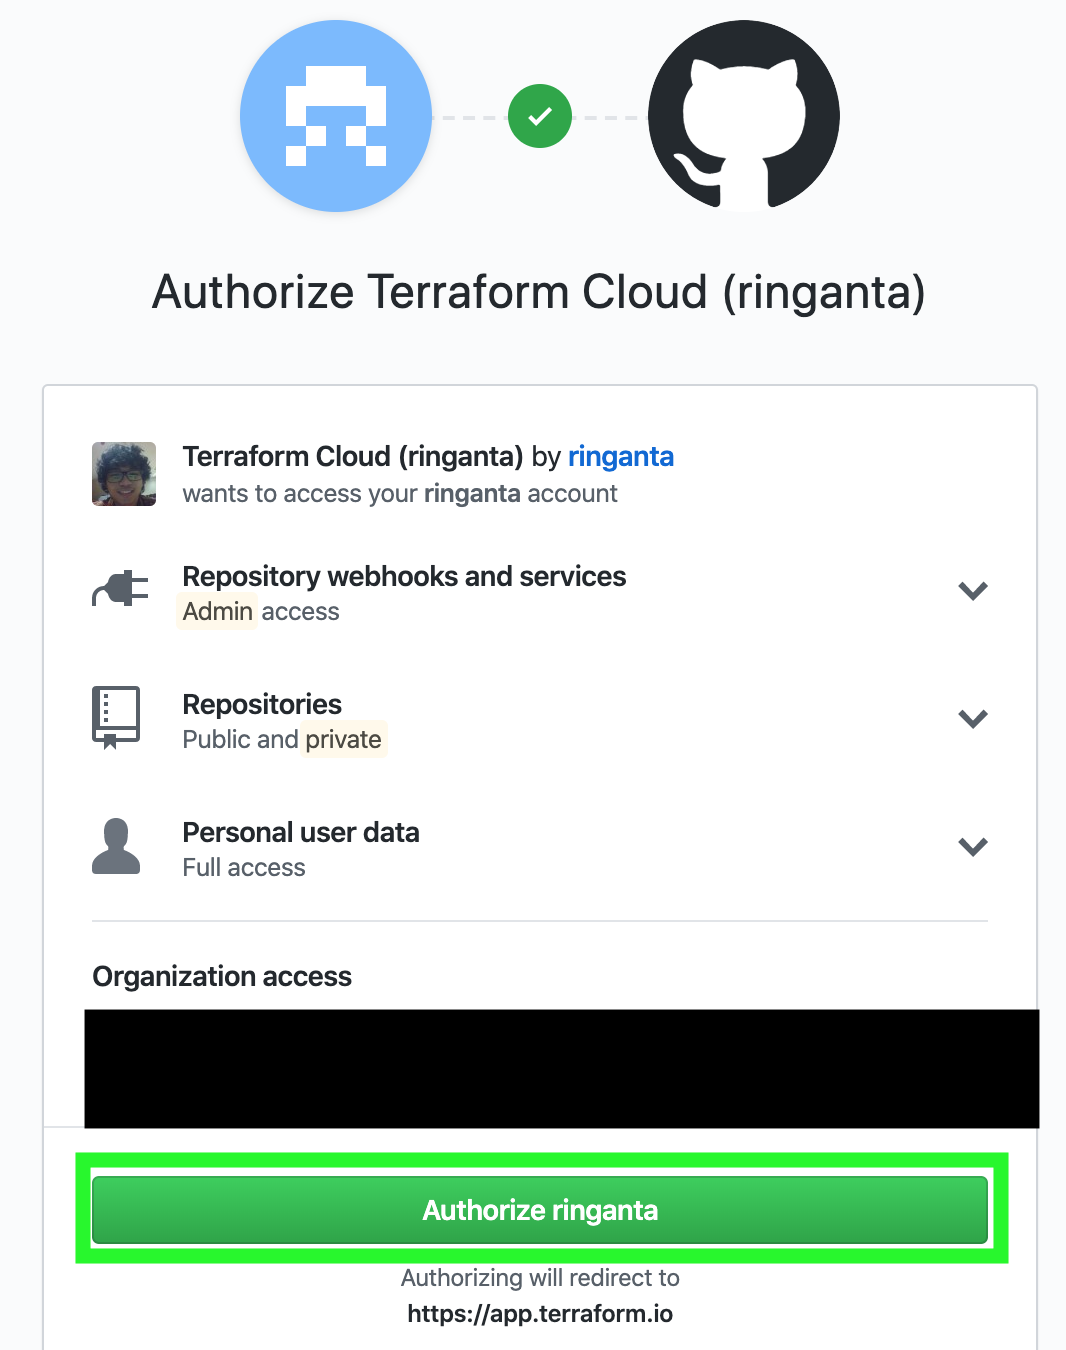
- We'll be directed to Github page. Click the Authorize ringanta to authorize integration between Github and Terraform Cloud. You may find the button with different name in your case.
- The last step is generating a new SSH key to be used by Terraform Cloud. The use case for this is when Terraform Cloud need to clone private repository that only accessible via SSH protocol. This is optional step and we can skip it.
Now VCS connection is ready, we proceed with publishing the module.
- Go to Module dashboard on Terraform Cloud and click the Add module button at the top right.
- Choose Github (Custom) on the Connect to VCS tab.
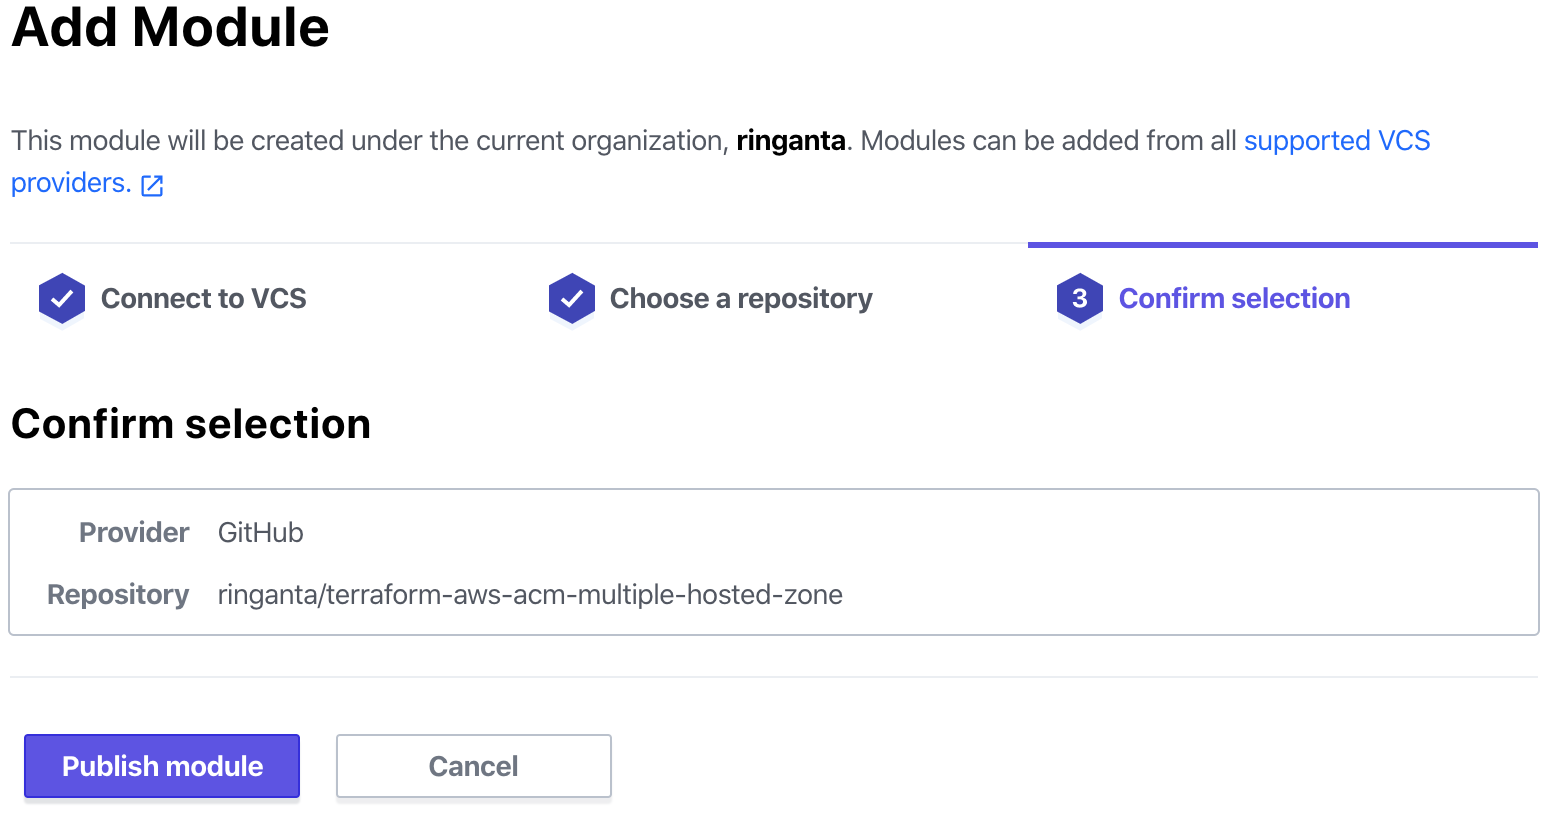
- Click the ringanta/terraform-aws-acm-multiple-hosted-zone repository.
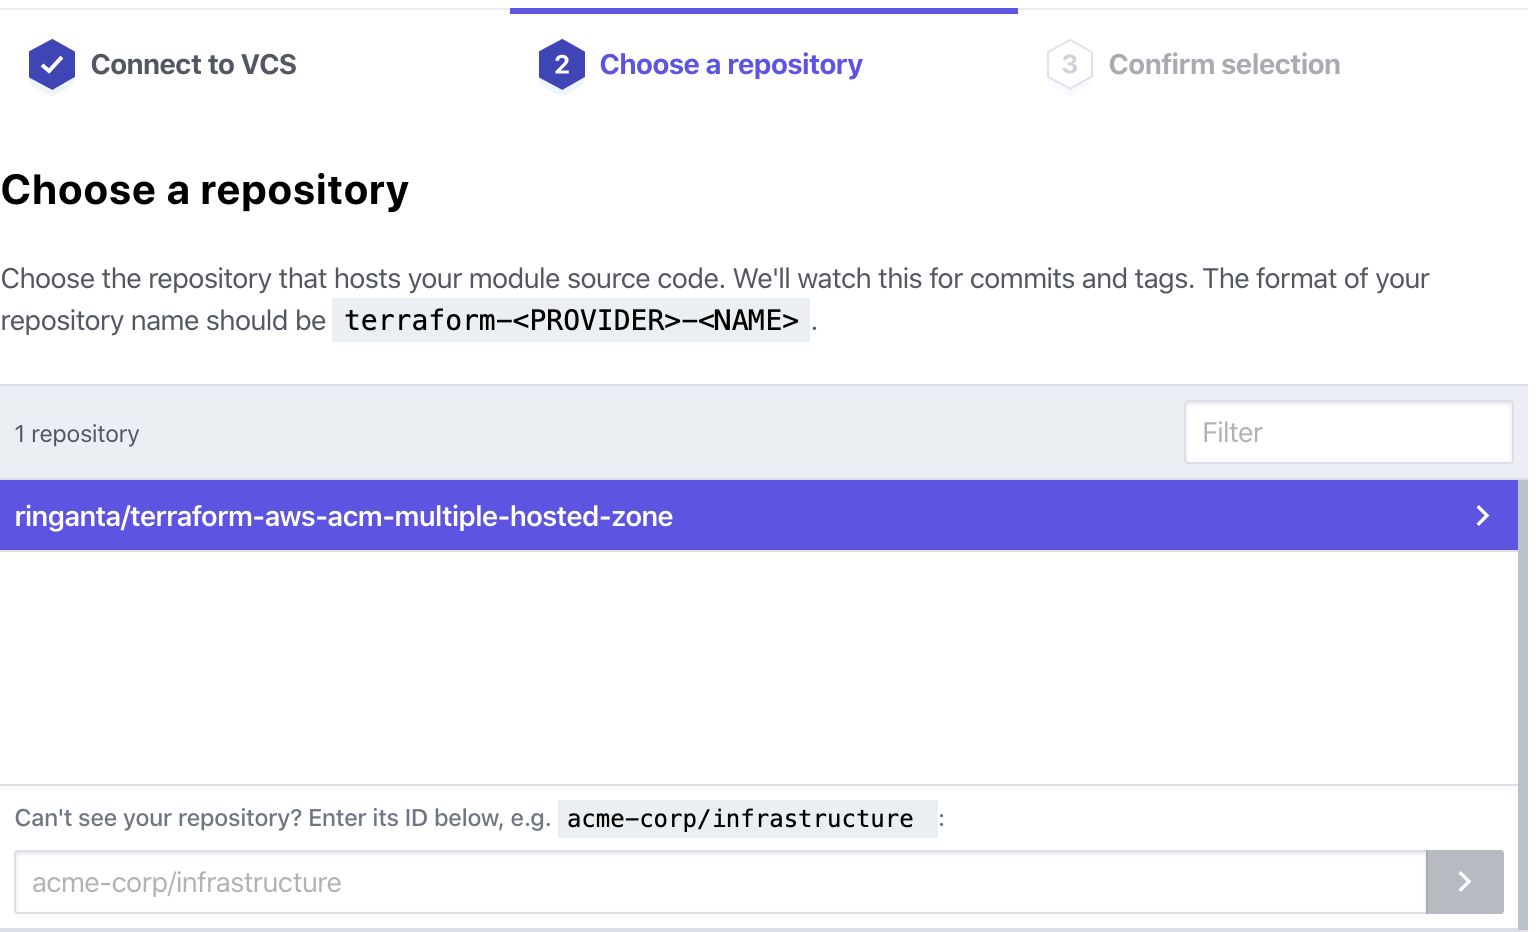
- Click Publish module on the Confirm selection tab to publish the module.
Finally here is the module that has been published privately on Terraform Cloud